
Aluminum Louvered Pergolas: A Homeowner’s Buying Guide
Covered outdoor living spaces return an average of $1.38 for every $1 spent at resale — outperforming kitchen remodels in most U.S. markets. Yet a significant share of homeowners who install pergolas choose the wrong structure for their climate and end up with two summers of regret before fixing the mistake.
This guide covers what louvered aluminum pergolas actually do, how the drainage and louver systems work, what sizing and installation truly involve, and how they compare to enclosed hardtop gazebos — everything you need to decide before committing $2,000 to $4,000+.
What a Louvered Pergola Actually Does (and What It Can’t)
A louvered pergola is not a roof replacement. It’s a precision shade-and-ventilation system — and that distinction matters before you spend anything.
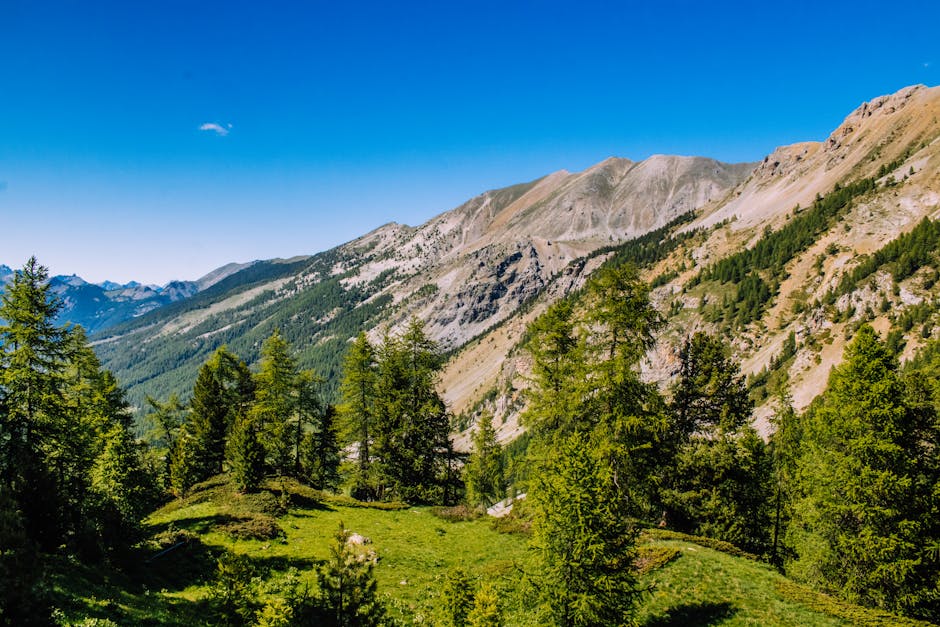
Traditional pergolas — wood lattice, fixed slats, the kind you see in every suburban backyard from the 1990s — provide maybe 50% shade coverage on a good day. Sun moves, shade moves, you’re half-cooked by 2 p.m. A louvered pergola has adjustable aluminum slats that rotate from fully open (0°) to fully closed (90°). At 90°, they shed light rain and block direct sunlight completely. At 45°, you get filtered shade without killing airflow on a hot afternoon.
What they can’t do: withstand a serious downpour at full closure. Most aluminum louvered systems are rated for light-to-moderate rain. The Garveelife 12×24 ft louvered pergola ($3,399.99) routes water through an integrated drainage system built into the frame rails, but a severe thunderstorm will still find gaps between slats. Weather-resistant, not waterproof — that’s the honest category.
Manual vs. Motorized Louver Mechanisms
Manual systems use a hand crank or pull rod to adjust slat angle. Zero electrical dependencies, lower cost, and nothing to break electronically. The tradeoff is obvious: you have to physically go outside and crank the louvers shut when a storm rolls in.
Motorized systems connect to a 24V DC motor and adjust via remote, wall switch, or smartphone app. Higher-end builds integrate rain sensors that close the louvers automatically. The Garveelife louvered model uses a manual system, which is one reason it hits a more accessible price point for 288 square feet of coverage (12 ft × 24 ft). If you want auto-close rain sensing, brands like Azenco and StruXure offer motorized systems — starting around $8,000–$15,000 professionally installed.
Wind Load and Snow Load: The Specs Most Buyers Skip
This is the number that matters most in extreme climates, and most shoppers ignore it until something goes wrong.
Aluminum louvered pergolas are rated in two ways: wind load (mph) and snow load (psf — pounds per square foot). A solid residential aluminum pergola typically handles 55–75 mph wind and 20–30 psf snow. If you’re in a coastal hurricane zone or regularly see 18+ inches of snow per storm, verify these ratings explicitly — they vary by brand and model.
Frame wall thickness also signals structural quality. Budget aluminum pergola kits use 1.2–1.5mm wall thickness. The Garveelife reinforced aluminum frame uses thicker extrusions, which keeps the structure stable under real seasonal stress rather than just showroom conditions. Ask any brand for the aluminum alloy grade — 6063-T5 is the standard for structural outdoor applications and handles thermal expansion from -20°F to 150°F without warping louver pivot channels.
Aluminum vs. Wood vs. Vinyl: The Material Question

Three materials dominate the pergola market. Here’s how they compare on the specs that actually determine long-term satisfaction:
| Material | Lifespan | Maintenance | Avg. Weight (12×16) | Price Range | Works with Louvers? |
|---|---|---|---|---|---|
| Aluminum (6063-T5) | 20–30 years | Annual wipe-down | 300–500 lbs | $1,500–$6,000 | Yes — ideal |
| Cedar / Redwood | 10–15 years | Stain/seal every 2–3 years | 800–1,200 lbs | $3,000–$10,000+ | Poor — swells and jams pivots |
| Vinyl (PVC) | 15–20 years | Occasional power wash | 200–350 lbs | $1,000–$4,000 | No — lacks rigidity for large spans |
| Steel | 20–25 years | Watch for rust at joints | 600–900 lbs | $2,000–$7,000 | Possible — but heavy and corrosion-prone |
Aluminum wins for louvered pergolas specifically because the louver mechanism needs dimensionally stable channels. Wood swells in humidity and shrinks in dry heat — that seasonal movement jams louver pivot points within two or three years. Vinyl doesn’t have enough rigidity to hold a large-span louvered roof flat under load.
For reference: the PURPLE LEAF 10×13 ft aluminum pergola ($1,499 at Costco) and the Sunjoy 12×10 ft model ($1,299) both use aluminum frames but don’t include louvered roofs — they use shade sail fabric or polycarbonate panels instead. If an adjustable louvered roof is your priority, you’re in the $2,500+ category regardless of brand. The PALRAM CANOPIA Feria 10×13 ft patio cover ($1,800) sits in between, with polycarbonate panels rather than adjustable louvers.
Powder Coat vs. Anodized Finish
Most aluminum pergolas ship with a powder coat finish (the colored outer layer baked onto the aluminum at 400°F). Quality powder coat at 60–80 micron thickness holds color 15–20 years without peeling. Anodized finishes penetrate the aluminum surface rather than coating it — more durable against scratching, but limited to silver-gray tones. If you want matte black (the most popular finish for modern pergolas), powder coat is the only option. Both Garveelife structures come in matte black, which passes HOA review in most neighborhoods.
How to Size a Pergola for Your Patio or Deck
Sizing errors are the most expensive mistakes because they’re discovered after installation. A structure too small looks awkward; too large and it violates setback requirements or overwhelms the yard.
- Measure the furniture footprint first. Place your outdoor furniture in position. Add 2 ft of clearance on each side. That’s your minimum interior coverage. A 6-person dining set typically needs at least 10×12 ft under cover.
- Add 2–4 ft to each measured dimension. Posts occupy 4–6 inches. A “12 ft wide” pergola delivers roughly 10.5–11 ft of usable interior width. Plan accordingly.
- Verify your anchor surface. Posts must attach to concrete, a deck structure, or freshly poured footings. Grass and gravel are not anchor surfaces.
- Apply the one-third rule. The pergola should cover no more than one-third of your total patio or deck area unless you intend it to function as a full outdoor room.
- Account for drainage direction. Even a “flat” louvered pergola has a 3–5% pitch built in. That runoff must exit away from your foundation and away from doors or windows at ground level.
- Check local setback requirements before finalizing dimensions. Most municipalities require 5–10 ft from property lines for freestanding accessory structures. A 12×24 ft pergola placed 3 ft from the fence line can trigger a permit revision.
- Plan finished height carefully. Standard post height is 8–9 ft at the top of the post. Below 8 ft feels confining for dining. The Garveelife 12×24 louvered model accommodates standard 8–9 ft finished height with included post hardware.
Freestanding vs. Attached: Structural Implications
An attached pergola (bolted to the house ledger board) transfers some roof load to the home’s structure — simpler foundation work, but requires a ledger connection that must hit structural framing, not just siding. A freestanding pergola carries its full load independently, which means four to six concrete footings and more excavation work. For a 12×24 ft freestanding structure, budget at least 12 hours of labor for footing work alone, plus 48 hours of concrete cure time before post installation can begin.
What the Integrated Drainage System Actually Does
This is the feature that separates a $900 carport kit from an engineered outdoor structure. When louvers close during rain, water pools on the slats and flows outward to the perimeter frame rails. Hollow aluminum channels inside those rails route water down through the post cavities and exit at ground level — no external gutters, no water sheeting off the roof edge onto your furniture or guests.
At 12×24 ft (288 sq ft of roof area), a 1-inch rainfall generates roughly 180 gallons of runoff. A properly designed integrated drain handles this without overflow. A poorly designed one pools at post bases and begins undermining your concrete footings after three or four seasons of freeze-thaw cycles.
Louvered Pergola vs. Hardtop Gazebo: Two Different Problems
What problem does a louvered pergola solve?
Shade control over a large, open area — a deck, pool surround, or patio. The adjustable roof gives you full sun in the morning and full shade by afternoon without moving furniture. The open frame sides keep air moving freely in summer heat. A 12×24 ft louvered pergola covers 288 sq ft with adjustable overhead coverage and works best when airflow is a priority.
What problem does a hardtop gazebo solve?
Creating a weatherproof, enclosed outdoor room. The GarveeLife 12×16 ft Sunroom Hardtop Gazebo ($3,399.99) uses floor-to-ceiling sliding doors and a solid aluminum alloy roof to function more like a screened porch than a shade structure. It covers 192 sq ft but fully encloses that space against wind, bugs, and rain.
Which one is actually right for your yard?
| Situation | Better Choice | Reason |
|---|---|---|
| Pool deck shade, large area | Louvered Pergola (12×24) | 288 sq ft coverage, open sides for airflow |
| Year-round outdoor sitting room | Hardtop Sunroom Gazebo (12×16) | Fully enclosed, rain-proof, bug-proof |
| Hot, humid climate (Southeast U.S.) | Louvered Pergola | Ventilation prevents heat buildup |
| Rainy climate (Pacific Northwest) | Hardtop Gazebo | Solid roof handles sustained rainfall |
| Outdoor dining — flexible weather use | Louvered Pergola | Adjustable coverage, larger footprint |
| Home office / workout space outdoors | Hardtop Sunroom Gazebo | Enclosed, weatherproof, more room-like |
Both structures are priced identically at $3,399.99. The choice is purely functional. Buying the wrong one is a $3,400 mistake that takes a full weekend to discover.
What Installation Actually Involves

Here’s the version that most product listings skip.
A 12×24 ft aluminum pergola ships across 8–12 packages totaling 600–900 lbs combined freight weight. The Garveelife model arrives flat-packed with pre-drilled components and labeled hardware. Every experienced installer will tell you the same thing: the instructions are technically complete but spatially confusing. Print them at full size before you start. Photograph each hardware bag before opening.
This is a two-person minimum job. Budget a full weekend: Saturday for unpacking, sorting, and footing work; Sunday for frame assembly and louver installation. Trying to solo it adds a day and introduces alignment errors that are miserable to correct once bolts are torqued.
Concrete Footings: The Step People Underestimate
A freestanding 12×24 ft pergola requires four to six concrete footings — one at each post location. Standard residential specification: 12-inch diameter, 24 inches deep (36 inches in frost-prone climates to get below the freeze line). You’ll use roughly two 60-lb bags of QUIKRETE Fast-Setting Concrete ($8.47/bag at Home Depot) per footing. Let it cure 24–48 hours before loading posts onto the anchor hardware. Skipping cure time is how posts shift during frame assembly and the whole structure ends up out of square.
Rent a one-man auger from Home Depot or Lowe’s for $60–$75 per day. Digging six 24-inch-deep, 12-inch-diameter holes by hand takes four hours. The auger takes 45 minutes.
Deck-Mounted Installation
Mounting posts to an existing deck skips the footing work but adds a structural load check. A 500-lb pergola frame with a 20 psf snow load across 288 sq ft generates up to 5,760 lbs of potential added load. Standard residential deck framing (built to 40 psf live load) handles this — but only if post bases are bolted into deck joists, not just decking boards. Run 1/2-inch lag screws into framing members, minimum 3-inch penetration depth.
Tools You Actually Need
- Cordless drill/driver with high torque — Milwaukee M18 Fuel or DeWalt 20V MAX are both fine. Budget drills strip structural hardware bolts.
- 48-inch level — 24-inch is too short to catch post lean across a 12 ft span
- Post hole digger or rented auger
- Rubber mallet (for seating louver pivot pins without damaging the finish)
- Socket set: 10mm, 13mm, and 17mm cover most aluminum pergola hardware
- Two sawhorses for assembling roof beam sections on the ground before lifting
- String line and stakes for laying out post positions square before digging
Permits, HOA Rules, and the Foundation Reality
Do you actually need a building permit?
In most U.S. municipalities: yes, if the structure exceeds 200 sq ft or is permanently attached to the house. A 12×24 ft freestanding pergola at 288 sq ft almost universally requires a permit. Permit cost runs $50–$250 depending on jurisdiction. You’ll submit a site plan showing the structure’s location relative to property lines and typically the manufacturer’s load specification sheet.
Two problems follow unpermitted structures: first, a buyer’s home inspection flags it at sale — you pay to legalize it or remove it at closing. Second, your homeowner’s insurer may deny a storm-damage claim on an unpermitted structure. Neither outcome is worth the permit fee you skipped.
HOA Approval Process
HOAs regulate color, height, style, and sometimes materials. Matte black powder-coated aluminum passes review in most HOA communities — it reads as modern and intentional rather than industrial. Some HOAs cap freestanding structure height at 10 ft or require full Architectural Review Committee approval for exterior additions exceeding $1,000 in cost. Submit your application with the manufacturer’s spec sheet and a photo rendering before purchasing. Most HOAs require 30–60 days for approval.
What about the electrical rough-in?
The Garveelife manual louvered pergola needs zero electrical at installation. But if you plan to add string lights (staple them to the frame rail — it’s designed for it), a ceiling fan, or a propane or electric patio heater later, route the electrical conduit during installation. Running conduit through a fully assembled aluminum frame is significantly harder than threading it through post channels before the roof goes on. A licensed electrician can stub out a weatherproof outlet at one post base for under $300 if the panel is close — far less than retrofitting after the structure is complete.
The single decision that determines whether a pergola purchase succeeds or fails: being honest about whether you need adjustable shade over a large open area, or a fully enclosed weatherproof outdoor room — because those are two completely different structures, and no amount of accessories bridges that gap after the fact.


